How to Vent a Kitchen Sink Under a Window: Complete DIY Guide
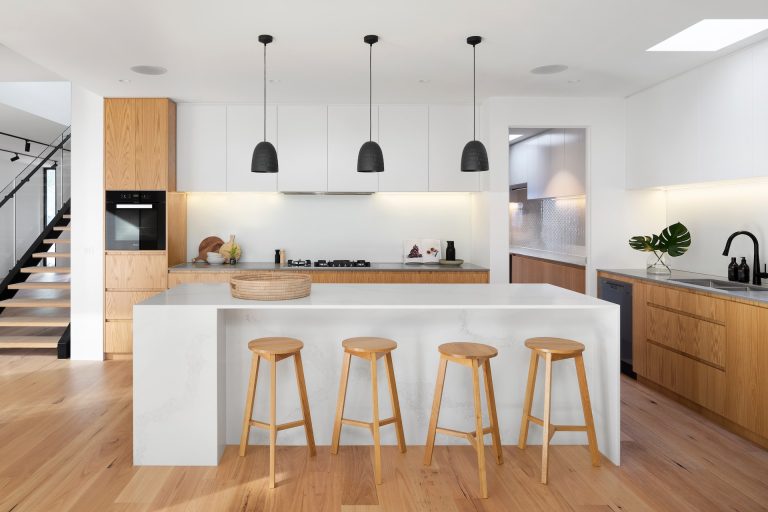
Did you know that nearly 60% of homeowners prefer to have their kitchen sink situated under a window? Venting a kitchen sink under a window can be quite the challenge, but fear not! In this post, we’ll delve into the ins and outs of how to effectively vent a kitchen sink under a window. From exploring different venting options to understanding building code requirements, we’ve got you covered. So, if you’re looking to optimize your kitchen’s layout without sacrificing functionality or aesthetics, keep reading for expert tips and tricks.
Understanding Sink Venting
Venting a kitchen sink under a window is essential for maintaining proper drainage and preventing airlock. Vent pipes play a crucial role in ensuring that the water flows smoothly through the drain.
Proper venting of a new sink involves understanding its purpose, which is to allow air into the plumbing system to equalize pressure and prevent suction that can slow or stop draining. Without adequate venting, negative pressure can develop in the pipes, leading to slow drainage or even causing water to be siphoned out of traps.
Inadequate venting can lead to several issues such as gurgling sounds from drains, slow drainage, foul odors emanating from sinks, and even backups. Properly installed vents prevent these problems by allowing air into the system so that water can flow freely without creating suction forces.
Vent regulations vary by location but generally require adherence to specific guidelines regarding pipe size, placement, and connections. For instance, local building codes may dictate the minimum distance between a kitchen sink trap and its vent stack or specify how many fixtures one vent pipe can serve.
Adhering to these regulations ensures that your kitchen sink functions efficiently while complying with safety standards set by local authorities.
Preparing for Installation
Tools Required
To vent a kitchen sink under a window, you will need basic tools such as a hacksaw, pipe wrench, and screwdriver. Specialized tools like a tubing cutter for cutting pipes and a reamer for smoothing cut edges are essential for vent pipe installation. When working on the project, safety equipment including gloves, safety goggles, and a dust mask should be worn to protect yourself from potential hazards.
Having the right materials is crucial. You’ll need specific types and sizes of pipes such as PVC or ABS pipes depending on your local plumbing code requirements. Along with the pipes, connectors like couplings and fittings such as elbows or tees will be necessary to ensure proper connection and alignment of the vent system.
Safety Tips
Safety should always be a top priority when venting your kitchen sink under a window. Be sure to turn off the water supply before starting any work to avoid accidental leaks or flooding. It’s important to take precautions against potential hazards by ensuring proper ventilation in enclosed spaces where you’ll be working with adhesives or solvents. Always use protective gear like gloves, eye protection, and if needed, respirators when handling these materials.
Identifying the Venting Options
Traditional Venting
Traditional venting systems for a kitchen sink involve installing a vertical pipe that extends through the roof of the house. This system allows sewer gases to escape while also allowing air into the plumbing system, preventing water from being siphoned out of traps. The layout and design of traditional vents typically require careful consideration during construction or renovation to ensure proper functionality. One key benefit is that traditional venting is highly effective in preventing sewer gas from entering the home, but it can be challenging to install in certain situations due to its specific layout requirements.
Air Admittance Valves (AAVs) provide an alternative solution for venting a kitchen sink under a window. AAVs are mechanical devices installed near fixtures to allow air into the drain pipes while blocking sewer gases from escaping. These valves are suitable for situations where installing traditional vents is impractical, such as when remodeling existing spaces or adding new fixtures. While AAVs offer flexibility and ease of installation, they may not be permitted by building codes in some areas and can sometimes fail over time.
Loop vents are another option for venting a kitchen sink under a window. This type of vent connects back down to the horizontal drain line after looping upwards, providing an additional pathway for air circulation within the plumbing system. Loop vents are necessary when there isn’t enough space for a regular vertical vent pipe or when other options aren’t feasible due to structural constraints. Installing a loop vent involves creating an upward loop before connecting it back down to maintain proper drainage flow.
Measuring and Planning
There are several considerations to keep in mind. The location of the sink in relation to the window will impact where the vent can be installed. It’s essential to ensure that there is enough space between the sink and the window for proper venting without obstructing natural light or airflow from the window.
One potential challenge with sink placement under a window is ensuring that there is adequate room for both the sink and any necessary ventilation components. To address this, consider installing a shallow-depth sink or opting for a smaller-sized sink if space is limited. Utilizing an off-center sink placement can provide more flexibility for accommodating both the window and vent requirements while maximizing counter space.
Addressing window constraints when venting a kitchen sink involves finding strategies to work around these limitations while maintaining proper ventilation. If traditional overhead cabinetry cannot be installed due to a window above the sink, consider alternative storage solutions such as open shelving or cabinets on adjacent walls. This allows for unobstructed airflow from any installed vents while still providing functional storage space within the kitchen.
Installing Traditional Vents
Cutting Pipes
When ventilating a kitchen sink under a window, cutting vent pipes is crucial. Use a pipe cutter or hacksaw to cut the pipes accurately. Precision is key to ensure that the pipes fit perfectly in the designated space.
Using suitable tools for cutting pipes helps achieve clean and precise cuts. A pipe cutter provides a more controlled and accurate cut compared to other tools like saws. It ensures that the pipe ends are smooth, allowing for seamless connection with other components.
Connecting Vents
The process of connecting vent pipes involves fitting them together securely. This can be achieved by using methods such as solvent welding, compression fittings, or rubber couplings. Each method offers different levels of security and ease of installation.
It’s essential to emphasize secure connections when joining vent pipes to prevent any leaks or dislodgment over time. Properly connected vents contribute to efficient air circulation and prevent sewer gases from entering your home.
Sealing Joints
Properly sealed joints play an integral role in ensuring effective ventilation for your kitchen sink under a window. Utilize sealing methods such as caulking, plumber’s putty, or specialized sealant tape at areas where two components meet.
Common areas requiring sealing include around pipe penetrations through walls or floors and at junctions between different piping materials.
Using Air Admittance Valves
Valve Placement
Air admittance valves are strategically placed beneath the kitchen sink to effectively vent the plumbing system. When positioning air admittance valves, it’s crucial to consider proximity to the drain, ensuring that they are located as close as possible to minimize air travel distance. These valves should be installed in an easily accessible location for maintenance purposes.
Best practices for valve placement include mounting them vertically and above the “flood level rim” of the fixtures they serve. This ensures that they can function properly by preventing any backflow of wastewater into the sink. Moreover, it’s essential to comply with local building codes and regulations when determining valve placement, as requirements may vary based on geographical location.
For instance, if a kitchen sink is situated under a window, installing an air admittance valve within the cabinet under the sink could be an optimal choice. This placement not only maintains aesthetics but also provides convenient access for future maintenance or replacement needs.
Installation Steps
Installing air admittance valves involves several key steps. Firstly, ensure that all necessary tools and materials are readily available before commencing installation. Then proceed by carefully following a step-by-step guide tailored to your specific kitchen sink setup.
The process typically includes identifying suitable locations for valve installation beneath the sink, cutting into existing plumbing lines if required, securely attaching and sealing the valve in place using appropriate fittings and techniques while adhering strictly to manufacturer instructions. Finally, conducting thorough testing post-installation is vital to confirm proper functionality and address any potential issues promptly.
Loop Vent Solution
Configuration
One effective solution is the loop vent. This configuration involves looping the vent pipe up and then down, creating a continuous loop that connects back into the main drain line. The advantage of this layout is that it allows for proper air circulation, preventing water from being siphoned out of the trap.
A key factor influencing the choice of this configuration is its ability to accommodate situations where installing a traditional vertical vent may be challenging, such as when dealing with an obstructive window or limited wall space. By utilizing a loop vent, homeowners can effectively address ventilation needs without compromising on aesthetics or functionality.
Installation Process
The installation process for a loop vent involves several key stages. Firstly, carefully plan and map out the route for the vent pipe to ensure it adheres to local building codes and regulations. Next, cut into the existing drain line at an appropriate location to create access for connecting the loop vent.
During installation, consider potential challenges such as navigating around obstacles like studs or other utilities within walls. Overcoming these hurdles may require creative solutions like using offset fittings or adjustable vents to ensure proper installation without compromising structural integrity.
Finishing Touches
Leak Testing
After installing the kitchen sink vent under a window, leak testing is crucial to ensure that the installation is watertight. A common method for conducting leak tests involves filling the sink with water and then draining it while observing for any signs of leakage. Applying soapy water to the connections and joints can help identify even tiny leaks by producing bubbles at the site of any air or water escape.
Identifying and addressing any leaks promptly after installation is essential to prevent potential water damage to the surrounding structures. It’s important to recheck all connection points, including where the vent pipe meets the drain line and where it exits through the wall or roof.
Aesthetic Considerations
When considering aesthetic aspects related to kitchen sink vents under windows, homeowners have various options for concealing or integrating vents into their design. For example, a custom-built cabinet can be designed around the vent pipe to seamlessly blend it into the overall cabinetry layout while providing easy access for maintenance.
Another option includes incorporating decorative elements such as wooden covers or metal grates that complement existing design features in your kitchen space. Ensuring that vents complement overall aesthetics not only enhances visual appeal but also creates a cohesive look throughout your kitchen area.
Maintenance Tips
Regular Checks
Regular maintenance checks on kitchen sink vents are crucial to ensure they function optimally. It’s recommended to conduct checks at least every six months. Signs that indicate the need for a maintenance check include slow drainage, gurgling sounds, or foul odors emanating from the sink drain.
Clearing Blockages
Common causes of blockages in kitchen sink vents include food debris, grease buildup, and foreign objects lodged in the pipes. To effectively clear blockages, start by using a plunger or plumber’s snake to dislodge any trapped material. Then flush the vent pipe with hot water and baking soda to break down any remaining residue. To minimize blockages, avoid pouring grease down the drain and use a drain strainer to catch food particles.
Valve Care
Maintaining air admittance valves is essential for proper venting of your kitchen sink. Clean these valves regularly by removing them and soaking them in warm soapy water before rinsing thoroughly. Inspect the valve for signs of wear or damage such as cracks or loose fittings which could cause improper ventilation.
Summary
You’ve now learned the ins and outs of venting a kitchen sink under a window. From understanding the importance of sink venting to exploring various installation options such as traditional vents, air admittance valves, and the loop vent solution, you’re well-equipped to tackle this project. Don’t forget the finishing touches and maintenance tips to ensure your venting system functions smoothly for years to come.
Now it’s time to roll up your sleeves and put your newfound knowledge into action. Whether you opt for a traditional vent or explore innovative solutions like air admittance valves, remember that proper venting is crucial for a healthy plumbing system. So go ahead, give your kitchen sink the ventilation it deserves and enjoy a well-functioning, odor-free space!
Frequently Asked Questions
How important is sink venting for a kitchen?
Proper sink venting is crucial as it prevents airlock issues and ensures smooth drainage. It also helps to eliminate odors and allows the water to flow freely, preventing gurgling or slow draining.
What are the different options for venting a kitchen sink under a window?
You can choose between traditional vents, air admittance valves, or even consider a loop vent solution based on your specific setup and local building codes.
Can I install an air admittance valve instead of traditional vents?
Yes, air admittance valves (AAVs) provide a practical alternative when installing traditional vents isn’t feasible. They effectively allow air into the plumbing system while preventing sewer gases from escaping into your home.
How do I ensure proper maintenance of my kitchen sink venting system?
Regularly inspect all components for any blockages or damage. Keep an eye out for debris accumulation in the vents and ensure that they remain clear to maintain optimal functionality.
Are there any finishing touches I should consider after installing a kitchen sink vent under a window?
Once installation is complete, make sure to check for any leaks and apply appropriate sealants if necessary. Also, double-check that all connections are secure before finishing up.